Showing posts with label SHOUT OUTS cause I love'em. Show all posts

Saturday, May 27, 2017

Two Bears In A Box

Hi Everyone,
I have a bit of a back story for this little box.  I will try to be as brief as I can.  Over the years at work my friend Kathy and I would go on break together. Twice a day for 15 minutes, for about 10 years or so. Maybe even more.  We would walk and talk and pretty much brighten each others day.  Kathy is a dear friend and we were always bouncing stories off of one another. At one point in time we worked in the same department but even when we changed our departments we continued to go on break together. Okay ... here is the story ... one day we were walking along and there on the ground we see one of those pencil topper animals. It was a koala bear.  It was so cute. We picked it up and carefully placed on the branch of a box hedge.  He looked so cute clipped onto the branch.  Every time we would walk we would look for him.  As the seasons would change we would check on him.  Sometimes it was difficult to find him.  That little koala hung in there through rain, snow and the summer heat for years.  We started to notice his fur was falling away.  Time was starting to take its toll on our little koala bear.  And time was beginning to take its toll on me as well.  Diagnosed in Jan. 2016 with pancreatic cancer I was out of work for 10 months.  I was thankful that I was able to return to work for about 4 months or so but as my health failed I once again left work in Feb. '17.  I felt like I abandoned my break buddy.  Kathy and I stay in close contact and one day she called me to tell me that the property owner where our koala was had taken down the hedges.  Our koala was gone! Kathy looked and looked for him but to no avail she was unable to find him.  We were both saddened by this turn of events.  Silly I know, two grown women getting upset over a pencil topper.  In the back of my mind I knew I had to somehow commemorate our break times together and our little koala bear too.  So here is a picture of my little something, something I made for my dear friend Kathy.

I am retiring from my position at work and I will miss everyone from my work family so much but none as much as my dear friend Kathy.  I really had fun with this box and those little bears and Kathy loved them too! Till next time friends, thanks for stopping by.
Lysa

Sunday, March 29, 2015

Kumihimo! Yes To A New Love!

Hi Crafty Peeps,
KUMIHIMO, How ever did I miss the onset of this crafty goodness?  Just a quick post to say WOWZER, I love to braid!!  I had shown the little one (Rory) a video by the "Frugal Crafter" (here is the link)
https://thefrugalcrafter.wordpress.com/2015/03/19/like-the-ones-you-made-at-camp-only-better/
and I watched as her eyes widen. Perfect I thought for this summer.  Let's get braiding.  Now I am not FRUGAL in any sense of the word so even after watching numerous vids on how to make a braiding disk, I of course went out an bought not 1, not 2, but 3 disks so that all the girly girls in the HOUSE could get their BRAID on.  Here is my first pic of my set up with the disk.  A basic spiral thanks to the frugalcrafter!!
Now mind you I should be in Easter mode as we are here in the end of March but I just happen to have yards of orange and black 2mm satin rat-tail in my crafty stash (You go Lysa, Save Everything!! Atta Girl!!) Super easy and super quick I love me some KUMIHIMO!! This my friends will be the beginning of a new love affair with fibers, beads, and all kinds of crafty goodness. Shout out of THANKS to Lindsay over at her blog  https://thefrugalcrafter.wordpress.com/
because I now know my summer will be spent well poolside and at the beach with an awesome craft that Me, My Daughter and Granddaughter will be enjoying this summer.  Here is a pic of my first finished bracelet. WOW Halloween in March.  Somebody please send me a Bunny!!
 See you next week and thanks for stopping by,
Lysa

Saturday, February 21, 2015

Charm Storage - Made by My Very Own Prince Charming!

Hi Everyone,
Snow is still falling here in Jersey, and I am DONE! I am not a winter person to start with and it just seems like it has snowed every weekend for the past 6 weeks.  While it is cold and not so inviting outside, here in the craftroom it is just charming. I have to say my charm stash has gotten a tad out of control and I figured I better get a handle on organizing these little cuties before I start buying things that I already have.  I liked the Darice bead storage jars from the starts and I had picked up a few to hold some scrapebooking embelishments awhile back. If you don't know what they are here is a picture:
24 little screw top containers that fit into a plastic case.  The lid of the case is not hinged so needless to say if you were to drop it all the containers would go flying. But I like them and I found them great for the charms when Rory and I were working on the bracelets during this past holiday season. I started to buy a lot of charms thinking of summer projects like the wine charms and the beachy bracelets. So back to the store for more containers I went.  True to form, like the craft hoarder I am, I was like a frenzied squirrel gathering nuts for winter. I don't know how it happened, it was like every time the family sat down to dinner I would sneak upstairs to the computer, get on ETSY and buy charms. Want to know how bad it is? Are you sure? OK, here it is, I have a charm of, of, (I can't) a dental chair! Yup, you know that silly reclining chair at the dentist's office, Yes I have a charm of it! OK, OK, so I have 4 of them . . . and I have toothbrushes and toothpaste and some cute little floss charms too! So wait, before you call the craft police I should mention that my Brother in Law is a dentist and I thought a set of dental themed wine charms might just be a cute gift to bring to the office the next time I go for a cleaning.  See I'm not so crazy, I just think ahead.  Now what I really wanted to tell you about is my awesome storage idea that the Hubster came up with.  I loved the trays and just needed a way for them to stack safely with no chance of falling.  So, my Prince built me a little shelving unit to match the awesome ink storage unit he made me last year.  Here are a few pics:
All that was left to do was paint it black to match the ink storage and figure a way to add a pull to the drawers.  Well I took care of that. I had looked at a few miniature draw pulls and liked a lot of them but all I kept thinking was the less I spend on the shelf the more I will have to spend on charms.  So here is what I did.  I drilled a small hold in the center of each tray and made a ribbon pull.  I locked each ribbon into place using some scrapbook eyelets (sweet, I love when I use something I already own) Here are some pics for the draw pulls:
I used a strip of white paper to find the center and  marked it with a sharpie marker.  I drilled the hole with my handy dandy drill master from Harbor Freight.
  It was easy and I didn't crack any of the trays.  Then I set an eyelet into the hole from the front and used a manual eyelet setter to lock it in place. Pictures? Why Yes, yes I do!:
I never thought I would use that manual eyelet setter ever again after getting my crop a dile. Good thing I am a hoarder and didn't get rid of it.(See, always prepared!!) Now to lock the ribbon in I made a knot in the ribbon and fed it through from the front to the inside of the tray. And ran a second eyelet from the inside to the front.  It looked like this:
Once in place I crimped the eyelet with a pair of needle nose pliers. It ended up looking like this after I trimmed the ribbon and sealed it with a quick pass of a lighter:
Once the trays were done it was ready to be filled and organized and now my awesome charm collection looks like this:


and it matches my ink storage too!
I am one happy camper thanks to my very own Prince Charming! Thanks Paul, you ROCK! Oh, I gotta go the peeps are heading out to shovel snow and I think I can get in one more charm order before the day ends! Thanks for stopping by,
Lysa

Sunday, January 25, 2015

Charms, Charms, Charms! I Just Can't Get Enough!

Hi Everyone, (or anyone who is still pit stopping my neglected corner of the Web)
One small humble post over Christmas! How sad is that? Please know I have been crafting away every single spare moment I have.  I just can't seem to get back into posting.  I think it is because I am in a "gear shift" phase. I have become obsessed with charms and charm bracelets. Bad pictures and all, this post will show you just how obsessed I am.  With that said here we go: So the bracelets at Christmas went over so big that peeps were asking me "What's next?" and my first thought was a Valentine's Day bracelet and after careful thought and consideration I decided that the cost for a give-away for that holiday was just over my budget.  I soon realized that my next "big" time of year was summer.  I get into summer big! I love the beach and my pool.  I love 4th of July and all the patriotic themes and the whole red, white and blue. I decided that the first bracelet I was going to make was the "beach" theme bracelet.  I set off to ESTY on my quest to find beach themed charms that would be cost effective so that I could make a slue of bracelets to pass out to my peeps.  This time round I threw in some wine charm wires because I know a lot of people who just don't wear bracelets.  This way I could make a little some'in some'in for everyone. Now here is where I get a tad crazy obsessed . . . So I am on ETSY and I return to a favorite shop called Loretta's Beads.  Here is the link to her ETSY shop:
https://www.etsy.com/shop/LorettasBeads
I just love her shop and have made multiple purchases from her.  She is located in California. Oh boy, did she ever save me at Christmas when I was making the music themed bracelets for the music teachers. Loretta had the best music note charms I could find! So of course with her great customer service and fast shipping I headed back to her shop for some beachy goodness.  Well right from the start I fell in love (that's love with a capital "L") with the open scallop shell #SC1909. 50 qty for $8.50.  OH BABY! that's a deal for sure! As soon as I saw them I knew I wanted them so without hesitation it was "add to cart"!!  They arrived fast.  Here is a picture of a few of them:
Are they not AWESOME!!!

So cute, right?  Yes, Yes they are perfect, but I knew I wanted more.(here is where the obsessed, she has to much time on her hands comes in) See the little silver ball that is the pearl.  Well, I thought lets get a real pearl in there. As it happens I had a broken bracelet of my Mom's in my crafty stash and I thought why not get out the ole Dremmel handpiece and get rid of the metal and add a real pearl.  By now you all realize this is a charm has a value of about 17 cents, but what the hay, I want to play with my craft supplies.  So I grabbed the E6000 glue, cleaned up the pearls from Mom's bracelet and there you have it . . . a real pearl in a .17 cent charm.  Here are some more pics:
Drilled out and ready for a pearl!!
Glued and ready to squeeze closed:
I squeezed carefully as to not snap the shell and it worked out perfectly. Here is a picture of the finished bracelet:

Now as you can see I can't take a picture to save my life, but I think you get the idea and the idea is when you spend your money on awesome craft supplies do your best to take it just one step further because that is what being crafty is all about.  Oh and check this out here is my other new crafty good mojo "Metal Stamping"  Yeah!, now all my bracelet include a tag with the recipients intials! Here is a pic:
Yup, this first beach bracelet is going to my daughter Samantha, simply because not only do I love her she is the best daughter EVER!!
Not all the charms on this bracelet came from Lorettas Beads but I highly recommend that if you are in need of bead she has the shop that can assist with all your needs.
Now I have to think of the perfect box for these bracelets.  Hope to be back soon with more bracelets to show you all.  Thanks for stopping by,
Lysa

Sunday, June 22, 2014

Stampin Up RGB Codes

Hi Everyone,
Now that things are settled down and summer is in full swing I can get back into the craftroom with a lighter heart.  I still am in the throws of the bedroom makeover but sometimes it is good to walk away for a moment to regroup thoughts.  I joined SU as a hobby demonstrator back in March.  I had no intent to sell, I just wanted to build my SU collection.  I love all that I have purchased and have a goal to stay with it for one year. Being that I don't sell the $$ commitment is big.  $300.00 a quarter, so I have sworn off the likes of AC Moore, Joann's & Michaels so that all my crafty $'s for this year will be spent with Stampin Up.  Now you all know I am more of a digital gal than a rubber stamper and my heart really belongs to Serif CraftArtist 2.  I love to make my own designer series papers and I like digi stamps more than rubber stamps. SU's My Digital Studio is fine but I love my CAP2 so I was happy that when I purchase digital files from SU they are all available for any other software package you use.  So if your a Coral fan or a PhotoShop fan etc... your good to go.  I needed a quick reference guide for the SU RGB Codes.  There were a lot available all over the internet but I wanted one that was on one sheet so that I could hang it by my computer for fast and easy reference. So I made one and thought others might have a use for it as well.  Here is a picture of the page:
  I have a .pdf file available here:
http://www.mediafire.com/view/jqhj5bl44op28oh/SU_MDS_RGB_codes_with_color_swatch.pdf
I left a blank block for next years In Colors because we all know how fast the year goes.  I reviewed and checked the page over and over so I am pretty sure I got it right.  The codes are direct from my MDS software.  If by chance someone catches a mistake please let me know so that I can fix it. Here is a quick idea for you.  I love to print tone on tone when I need a piece of coordinating paper.  So I will say create a page of small hearts in Real Red and then print them on Real Red cardstock.  You will be pleased with the tone on tone effect. Hope you enjoy this file and before I go I want to give a shout out to my precious Granddaughter Rory for a job well done as she leaves elementary school and moves up to middle school - Here's to you, Rueski Rue, I sure do LOVE YOU!
Thanks for stopping by and have a great week!
Lysa

Saturday, March 8, 2014

Crafty Goodness, The Hubs Strikes Again!

Hi Everyone,
Oh wow how weeks do pass! We have all been busy around here watching winter slowly turn to spring.  I must say today is beautiful here in Jersey. The sun is shining, the windows are open and I can hear the high school marching band practicing for tomorrows St. Pat's parade. I thought I would pit stop my blog to show you some pics of the cabinet the Hubs has made me for my ink storage.  He sure is a wiz these days with wood.  I asked if he could copy the ink storage system that is made by Stamp-n-Storage.  I showed him a picture and asked if he could change it up to be taller and narrow to fit the space where my current ink caddy is.  I knew I wanted it to hold a future Stampin' Up collection that I plan to purchase so I asked for 3 columns of 20, thinking that I could work with a total of 60.  I was amazed how great it came out.  Here are some pics I took along the way:
 WOW! he did an awesome job, it looks great and then I told him I wanted it painted black. Really I drive the dude crazy.  I love my SU ink and I mostly use re-inkers as I am not a huge rubber stamper and mostly use ink with sponges to highlight.  I told the Hubs that it would cost $1,000.00 to fill that cabinet with the pad, marker and re-inker. Well, let's just say I won't be placing that order any time soon. In the meantime I painted the cabinet black and hung it on the wall in the craftspace and it looks awesome!! Here is a pic and as you can see it is completely filled just waiting for me to collect more ink!
 I love how the shelves can be moved around. I made 1 box to replace 2 shelves in the first column so a my SU re-inkers are there.  I figure as I buy new pads, re-inkers and markers to complete my SU color collection I can use the shelf for all my other ink pads.  I love this shelf and a huge shout out to the Hubs (Paul) for a great job.  Hope you all are having a great weekend and thanks for stopping by,
Lysa

Monday, February 10, 2014

Valentine Monster Hugs, LOVE 'Em! and a Shout Out to Stampin' Up's Angie Juda

Hi Everyone,
Wow, look at me posting on a Monday.  I had such a great crafty weekend with team Nonna & Rory that I could not wait to get home from work today to post some pictures.  Not only was I working on my Valentine's for the work peeps I also helped Rory with her Valentine's for school.  I had showed Rory Stampin' Up Monster Hugs and she thought they were so cute that she wanted to make them.  After ordering them they arrived in no time at all and were even cuter in real life than in the picture.  Now for many reasons our public school system likes a healthier style snack in lieu of chocolate or something sweet.  They even send a list home.  Most people step outside of the list but, hey who am I to break rules at my age!  We like to use pretzels for valentines.  So we came up with an awesome way to use our Monster Hugs with a box of pretzel sticks. We had a lot to make and Rory was off on an over-night so I thought it would be best to prep all the parts for her so that she could focus on assembly when she got home on Sunday.  It worked out perfect.  Here is a picture of the kit re-make I set up for Rory:
 What I added to the SU kit was a 2 inch by 9 inch strip of crumb cake cardstock that I hand stamped tone on tone with crumb cake ink.  I cut the arrows with my KnK Zing out of Midnight Muse cardstock for the boys and Calypso Coral for the girls.  I used CAP2 to make and print the tags. I also used CAP2 to print the paper for the belly bands and small hearts for the hands.  The belly bands are 3/4 " wide by 6 1/5 inches long.
So when Rory got home we set out to complete all of her Valentine's for school as I have a super busy work week this week and I was thinking if we did not get them done it might be a problem.  Here are some pictures of Rory along the way and our completed Valentine's. Rory did an awesome job!


And the final crafty good haul:
I have to tell you that this project is a favorite of mine.  I am a huge Stampin 'Up fan and even with my little bump up this kit was cost effective and made for a wonderful experience to share with my Granddaughter.  My demonstrator is Angie Kennedy Juda and her blog link is here:
http://www.mychicnscratch.com/
She always has a fresh idea and something fun going on.  Please visit her if you are thinking of purchasing any Stampin' Up product.  I have never met her but have been a fan for years and purchase all my SU through her.  She is AWESOME!!! So SHOUT OUT to Angie, I just can't thank you enough for all your fantastic ideas! We should get together someday so I can teach you to love that Silhouette cutter you have!!
Have a great week Everyone and a Happy, Happy Valentine's Day,
Lysa

Saturday, September 7, 2013

Halloween 2013 For The Work Peeps!

Hi Everyone,
It is an awesome fall day here in Jersey.  The air conditioner is off and the windows are open.  Even though I am a summer girl I must say with the horrible summer weather we had, today is just simply lovely.  So what did I do? Well, I never left the craftspace! Yes, it is true, on this beautiful day with so many chores to do I never left the room! But, with the windows open and the smell of Autumn in the air I was sure happy living in my own private Idaho (sorry Idaho, I just can't let it go). So, this years Halloween favors for the work peeps are proving to be one of my all time favorites. I do want to tell you that true to par I am no photographer as the following pictures just don't show these cuties in their true light! Please stay with me as I make a long story out of a quick and easy project. First my friend Joanne (Hi Jo!) gives me 2 spools of ribbon that went unused at a her niece's bridal shower. Joanne's niece (her sister Elle's daughter (Hi Elle))is getting married, probably as I am typing right now. Yup, right now! So anyway back at the point. They (Aunt, Mom,& the bridal party) decorated a party room at a winery for the bridal shower and they had some left over ribbon, and guess what? They thought of me! ME, yeah, Score!! Free awesome crafty ribbon goodness comes my way! Here is a picture of the free crafty goodness:
Ahh. . ..  almost 50 yards of crafty good white and opal mesh ribbon! So of course the first thing I thought was "gee, this is going to sit in my stash for a long time until my next wedding favor job".  Then I thought, "Maybe Christmas?"  I added the crafty good ribbon to the stash and was happy that someone thought of me.
Then, I went to work on Tuesday and my favorite AVON lady (Hi Donna) hands me my order. OMG!! happy dance as I open the bag to reveal the cutest Halloween emery nail files I have ever seen! Stay with me people, I am getting to the craft. So now I have awesome crafty ribbon and an awesome crafty favor and all I need to do is figure out how to package them up. Well here it is, my crafty good favor for the girls at work!
So cute, want to see what is inside? here he is:
He is the cutest nail file I have ever seen and the girls are going to love him!!!  Here is a few more not so great pictures of them:
I can't wait to give these out to the work peeps. I already called Donna to tell her to order me 10 more Avon files so that I have enough to send to Sam's office as well.  Pulling apart the white mesh ribbon that Joanne and Elle gave me created the perfect ribbon web effect for my little coffin fold overs and I just loved how the opal fibers catch the light just like a real web.  I really wish I had a better handle on photography so that you could see just how cute these little coffins are.  I hope you think they are as cute as I do.  And more importantly a shout out to Joanne and Elle on the big wedding.  I am thinking of you both and sending cheers, wishes and blessings to you both and to the Bride and Groom for a long, and happy life together.
Thanks for visiting,
Lysa

Monday, August 19, 2013

Crafty Goodness In Clear Plastic Pegs!

Hi Everyone,
I know it has been a long time between posts and so much has been happening that it is so difficult to find time to sit down to type!  I almost feel like I am so off grid that there is no getting back. I am happily finding joy in the new craftspace (so much so that I hate leaving the house each morning for the real world of work) but I do because I know it's the paycheck feeds the habit! And here it is the new habit. But wait the name sounds so pretty. It like a song to my ears. Are you ready? It's RAINBOW LOOM. How bad can a habit be if the word RAINBOW is involved?  So this is how it starts, You go to family reunion (which by the way way was AWESOME!) and one of the little peeps has this plastic peg loom that you loop colored rubber band over pegs and you use a crochet hook to lock the rubber bands into a chain.  Simply put you are using basic crochet to make a bracelet.  Ok, so the darn thing has been around since 2011 and even won a CHA innovation award.(How I missed that, I can't explain!)  So the 9 year old love of my life produced a bracelet for me in about 4 minutes flat using the darn thing so I get it in my head that this is the new 2013 version of my lanyard plastic lacing days. Here is a pic of the loom:
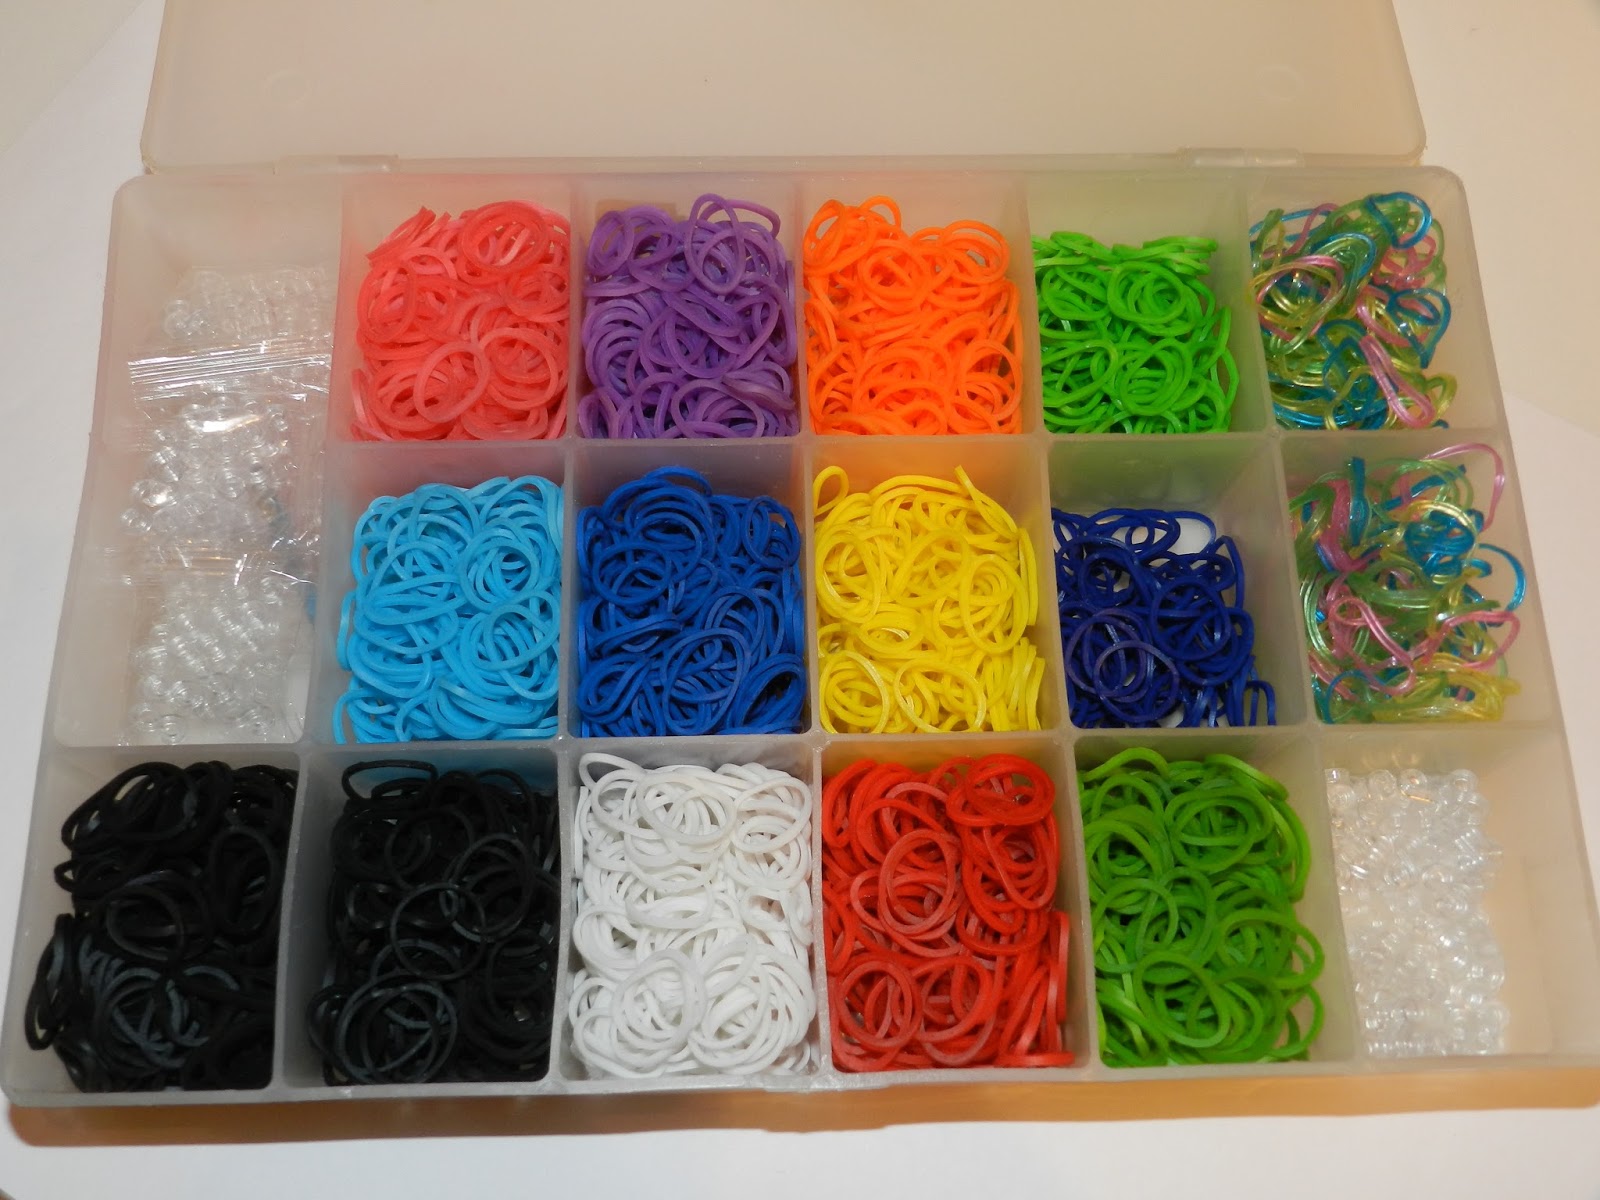
OMG, it was love at first sight for me.  I watched a young person teach another young person how to use this little plastic loom and that to me translated to my old camp days. I asked my cousin Peggy where she got it and she told me she picked it up at Shop Rite.  Really! At the supermarket!  It is clear to see I am now living under a rock, not just a rock but a big giant rock.  I was at my Shop Rite last night! I didn't see it. What is going on?  Was I so consumed with looking for what I needed in groceries for the family picnic that I (me, Lysa) looked right past this awesome crafty goodness right at my local supermarket! Sad, I know, but wait I still am truly an INSANE crafter because I sent dear Hubs back to Shop Rite at about 8:30 a.m. on Sunday in search of the thing.  He was back in like 15 minutes with a Rainbow Loom in hand.  I was happy, but not as happy the little girl.  Oh you had to see it.  She pulled it from his hands.  (here is where I get a bit corny as I don't know which was better her opening the box or me watching her open box) The look on her face was beyond anything I could imagine.  Her smile was surly ear to ear.  I never saw a kid open a box so carefully so as not to destroy any content that lay inside the box.  I was in heaven and so was Rory.  So now I get really obsessed, I got a 9 year old who is chomping at the bit to craft and a couple of dollars in my pin money wallet. So what would any insane crafter do.  Why that would be to send the Hubs back to Shop Rite to get me a RAINBOW LOOM of my own!  Yes, sadly it true I needed one too!  OK, so it does not end there.  Now we need a lot of the awesome colored bands.  Here is a picture of that:
 Really is 7200 rubber bands to many for any household to have. Well no because that is just my stash.  Here is the picture of my bands:
ohhhh, look at the pretty colors!!


and here is Rory's stash,

That is like another 7200 bands. Wow, we are ready to make bracelets for sure. You can clearly see we are head over heels in love with the Rainbow Loom.  Here is a close up of some of the bracelets Rory made yesterday:
 If you are looking for a gift for a 8 to 14 year old (or an oldie like me) we (Rory and I) highly recommend the Rainbow Loom as we love our new Awesome Crafty Good tool! Thanks for stopping by and Rory and I are off to make some bracelets.
Lysa