Showing posts with label The new craft room. Show all posts

Tuesday, August 6, 2013

And Now, Some Awesome Crafty Goodness From the Hubster!

Hi Everyone,
You know I always have a bit of a winded story so I will do my best to keep it on the shorter side. So one day I am talking to my friend Kelly and she says "Have you seen this thing that Costco is selling?  It's like a storage cabinet that attaches to your door hinges!"  "It just hangs behind the door without those silly clips that go over the top of the door. It's called a Cabidoor" I say "No, what it looks like?" and sure enough she had a picture to show me. Here is the picture:
OK, being I was looking for gift wrap storage in the new craftspace I locked on right from the beginning.  That was until I saw the $160.00 price tag.  Not only that when I went online to research it a bit I saw it from Improvements catalog for a whopping $189.00!  Come on its cool and all but $189.00.  You know that is out of my price range for sure.  Than I thought well maybe I would ask the family for it for either a birthday or holiday gift.  I really did like it a lot.  So I showed the Hubs a picture of it and he liked it too.  But like me he thought the $$$ was a tad high.  He looked me in the eye and said "I think I can make it"  Now he really is the kind of guy that wouldn't say it if he thought he couldn't do it. And sure enough, don't you know I get home from work on Friday and he had made it!  I just love it. Here are the pictures of my homemade version of the Cabidoor.
He even made the bracket that attaches the cabinet to the door hinge
I used simple command hooks for my all occasion wrap
I just love how when the door is open (which it almost always is)  you would never know my gift wrap is happily living in a depth of 4 inches.  I am so happy that I am  using that space, in a small room like this no space can be wasted! Paul spent about $36.00 to make this awesome gift wrap storage for me. Here is my SHOUT OUT of thanks to Paul  for making the craftspace even better and for making me one happy crafty camper!  You da best Hubby EVER!!!
Thanks for visiting,
Lysa

Monday, July 8, 2013

More Pictures Of The Craftspace

Hi Everyone,
Box after box, bag after bag, I am hauling supplies in to the new craftspace. I am now finding it funny as I am in the garage rooting through boxes.  I take something from one box, something from another and now all I have is a bunch of half filled boxes.  I am making headway and I have some pictures to share but I am now seeing clearly that all the crafty good stuff from downstairs is not going to fit into this room.  I am not sure how I will deal with the "left overs" yet but I am sure that I now can see what I did right and wrong when I planned this room.  What I did right was easy. I knew I needed a large working counter top. I knew I wanted narrow shelving above it for easy access to supplies I reach for all the time. I knew I wanted the shelving to be tall so that the out of reach area could be used for some decorative things.  I was successful with drawers.  I knew I wanted a lot of drawer storage. My score with the bins from Lowes worked out great.  I even started to label everything and I think the label came out great. Here is a picture:
I still have 11 more to label.  The units are filled I just haven't gotten to them yet. Not to waste any space, look what is hiding behind the 5 shelf unit by the door,
Yup, that's my crafty good mat storage for my digital die cutter.  A simple hook attached to the frame of the shelves with a zip-tie and all my cutting mats are in one place.
The Billy bookcases worked out well too.  I love my paper behind the glass and having everything on a shelf with easy access it just awesome.  They filled up quick and if I only had the space I could have used 2 more!!  Here is what they are looking like now:
Wow, they are maxed out and I still have a lot of crafty good stuff in the garage.  I wanted to keep the top of of the shelf for decorative things but all the drawers, baskets, and cigar boxes are filled with supplies. But I did save room for my camera collection. Here is a shot of that action:
 One would think a person with all these cameras could take some really cool pictures. Oh well, I am working on it.  See my Singer sewing table drawers?  Yup, that leads me to what I have done wrong. I love that table and since I couldn't fit it in the room, I brought in just the drawers. No worries I can re-attach them with ease as they just screw right back on.  The home office worked out and Paul even added a TV.
I love this space because I am away from the craft area.  It worked out just fine and I have a bit more work to do on it.  The other thing I did wrong was that there is no closed closet space.  I traded that for the home office area.  Now you all know some craft supplies are just a hot mess and with no door to hide them behind I am finding that a bit rough.  Also I really could have used a small bookshelf just for books and magazines.  I collect a lot of  media like manuals and such and I forgot to account for them.  Another other thing I missed was my gift wrap storage.  I am a huge gift wrap fanatic and I would have loved a gift wrap area or at least some dedicated storage. All in all I am on cloud 9 and am happy with all the work we put in to the 3 rooms. I know all of us are so happy with our new space and I am going to keep on rolling toward finally getting back to crafting. Thanks for visiting and hope to be back soon with a project instead of room redo pics.
Lysa

Wednesday, July 3, 2013

Move'n In!

Hi Everyone,
Finally it is time to start moving all my supplies into the new craftspace.  I have been rushing home from work everyday and bringing things in little by little.  I have a lot of cleaning to do along the way as all my boxes got pretty dirty and beat up while being in storage. I just can't believe how fast it all came together.  I have to give Paul most of the credit.  I would say "I need" and he would say "No problem"  He did an awesome job reworking shelving, running wires and making my new work space exactly like I wanted.  Thanks Paul, you get the husband of the year award for sure!!  So I really need to go back to the beginning and show you pics of a few things.   Here is a picture of a shelving unit that I saw in the ABC Distributing Catalog.  I loved it the minute I saw it.
It sold for $25.99 plus shipping.  I liked it so much because the shelves are just under 7 inches deep.  I thought this would work out great for the shelving above my work desk.  I bought 3 of them and when they arrived I loved them even more because I knew I could switch them up a bit and create an entire wall of shelving for less than $100.00.  Paul needed to make some adjustments to the hanging hardware because they are not designed to hold the amount of weight I was planning on.  Here is a picture of how they came out:
I know it doesn't look like much but that is 93 X 72 inches of shelves.  Here is a picture of how it looks now that it is filling up with all kinds of crafty goodness:
Love!!! Paul cut me 2 panels of sheet metal from my original magnet board so that I could still have my favorite embellishments right at hand.  Here is a close up:
I love having my work desk back. If I need a ruler, It's right there.  Scissors right at hand as well.  It came out great and there is a bit of room left up high for some decorative things.
Next I started to work on the paper storage.  I have been trying to organize it in between opening up boxes and unpacking things.  Here is a before and after picture of the Ikea Billy bookcases.
 Wow, they are filling up fast! I decided to switch up the basket side with the machine side so that from the entry point it would be a cleaner look.  But as you can see there will be machines on both units.  In the top picture you can see where Paul made me a top for the black drawer unit.  The top is recycled from Rory's bed frame.  It was part of the headboard. Paul cut it down and made plugs to fill the screw holes.  It came out great and gave me another work surface.
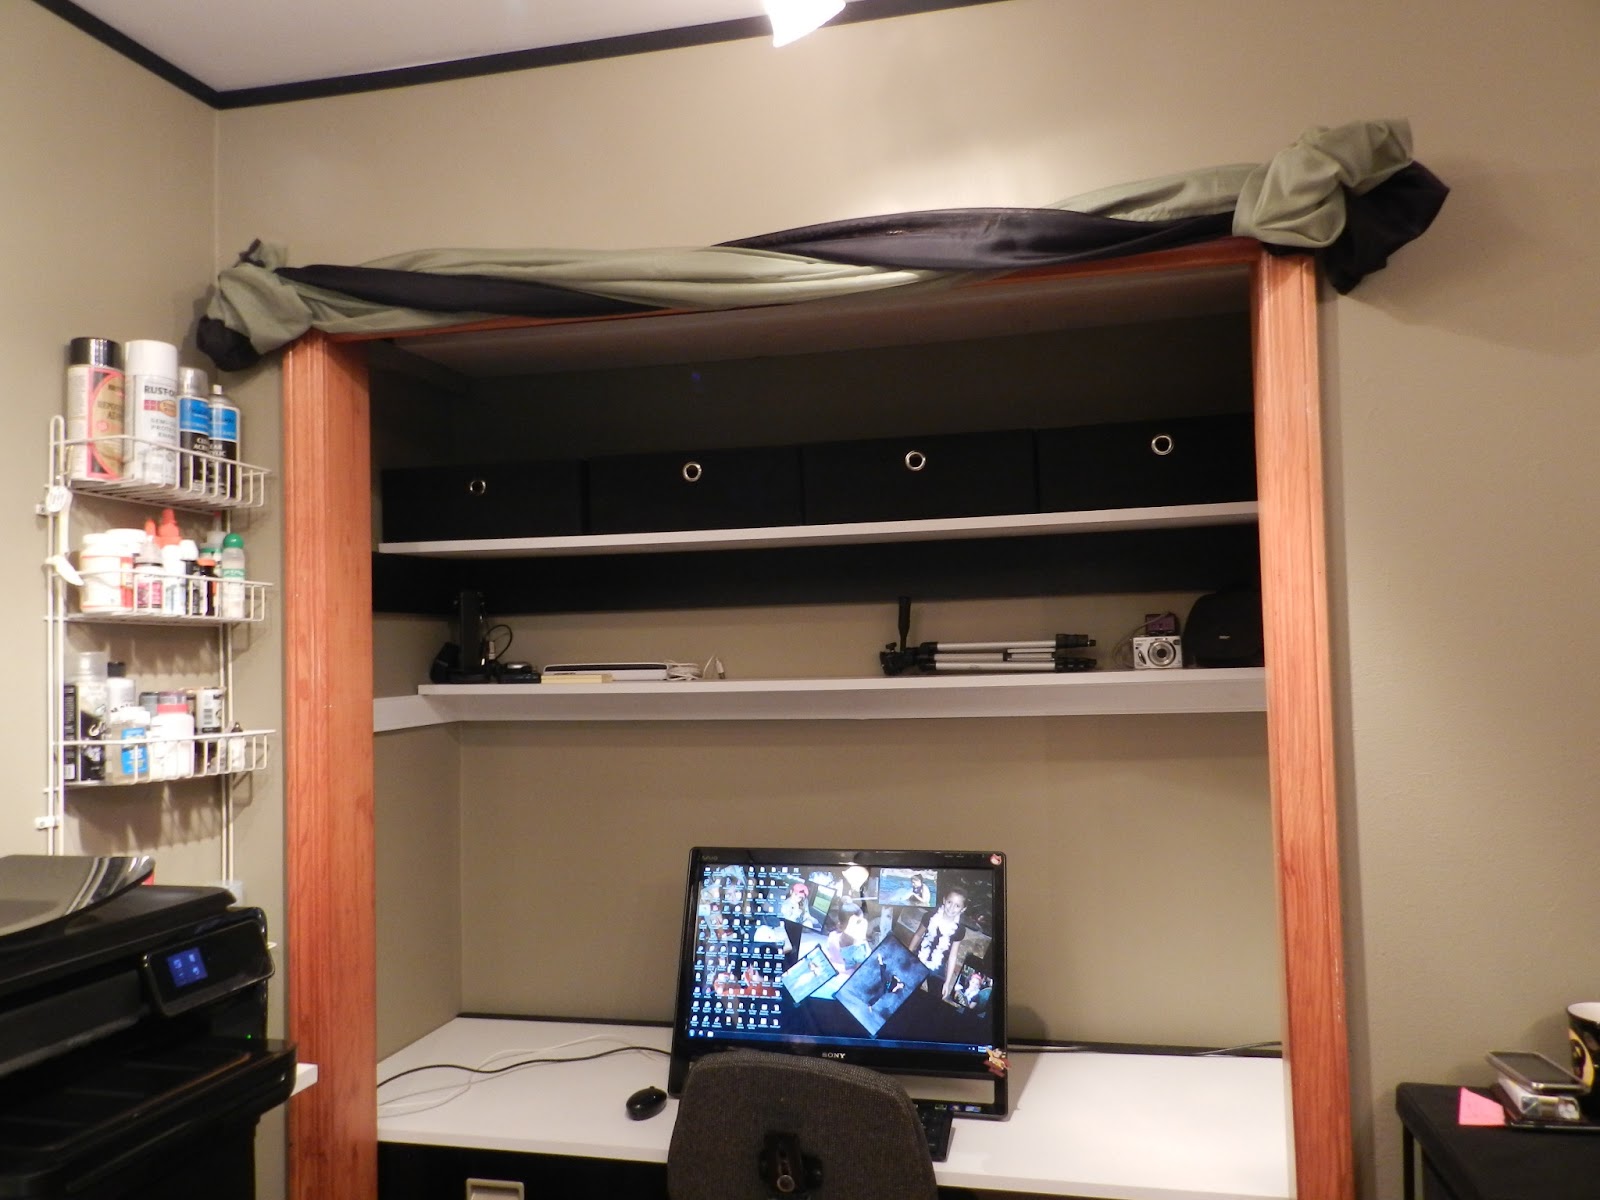
I didn't want any curtains in this room but the window moulding is shot.  There are paint splatters all over so I thought I would add some curtains.  I bought sheer curtain scarfs from the SwagsGalore website for $15.00 each.  The panels were 40 X 216 inches.  I had them draped and swaged and just didn't like it.  So not to waste the fabrics or have them live in my linen closet I decided to run them across the top of the window and across the top of the closet.  I cut them in half at the width and used 40 X 108 inches on each.  All I did was hang cheap hook from Lowes, pulled the fabric through rubber bands, gave the fabric a twist and there you have it, my 2 treatments for $30.00.  Here's the pictures:

I am pretty sure you can tell that I didn't even take the time to iron the panels.  That's because all I wanted to do was unpack more boxes.  Doesn't my new home office area in a closet look cute.  I still have a bit of work to do there. At least my PC is out of the dinning room! And sure enough there are those black drawers again.  I bought every one that I could find at 2 Lowes. In total I have 27 drawers.  So here is how that worked out  I made 2 - 4 drawer units for under the window, 1 - 5 drawer unit next to my work space (my large format printer fits on it perfectly), 1 - 5 drawer unit by the door and 2 -3 drawer units to fit under my work table. These could not have suited my needs better.  I will be labeling them with bookplates that I pulled off of my old metal file cabinet (which Paul is taking for tools)  He will use sticker labels but I wanted a nicer look.  Here is a picture of the plates:

The best part about these drawers is that they are easy to switch up.  I am filling them up and when I am done unpacking I will be able to change them around from rack to rack with ease.
Before I go here is my before and after picture of the room from the same angle.  I just love how it is coming together.
I just can't wait to get some crafty goodness going in this new space. And not to promote crafting and drinking but I think it's time I settle in and enjoy a Martini in my new space
Now doesn't that look yummy!
Thanks as always for visiting and hopefully my next post will be a crafty one!
Lysa

Saturday, June 22, 2013

Craftspace Update, I Am On Schedule!

Hi Everyone,
The ole homestead is still on hot mess! We are all running our tails off around here with all kinds of activities in addition to trying to complete the room redos. The end of the school year is upon us.  We enjoyed Rory's solo at her spring concert. She did an awesome job.  Birthdays and graduations, along with a charity project of Sam's have all added up to one heck of a busy family! I have been using vacation time to try to get the painting done and finishing the last room.  I am almost there. Before I give you all a bit of a sneak peak I wanted to show you a few of the tricky tray prizes for a charity event that Sam is participating in for a cancer fund raiser.  We made eight gift bags/baskets for the raffle and they came out great.  No bow work on these because that will be done by someone else.  The bows will dictate the ticket entry amount.  We still have 2 more to do by Monday so I know what we will be doing tomorrow.  Here are 3 of the them:


I love doing baskets.  It is so much fun filling them up with all the goodies.  I hope the event bring in lots of money for their donation.  This event is person specific and it is my understanding that this patient is in great need because in addition to being so ill he lost his home back in October when Superstorm Sandy hit Jersey.
Now the craftspace is coming along great and I really think I will make my July 3rd target date to move in.  I will be using more of my vacation time for the July 4th holiday to really be finished and moved in.  Every time I walk into the room I get excited about moving all my crafty good supplies into their new home.  Here are a few pictures of how it looks right now:
 It took us all of last weekend to install the barrel fan and the 2 tracks of lighting.  I love both the fixtures.  The track is a metal branch shape and really provides a lot of light.  There are 12 - 50 watt bulbs.  Paul installed a dimmer switch so that I can tone them down when needed.  The fan is cool too.  No more blades to clean.  It operates independently from the tracks and the little center light makes for a great night light.  The leaves on the fan and the tracks don't really match but hard as I tried I could not find a barrel fan that matched the tracks perfectly.  The wall color is called Sag Harbor and I can see on my screen the picture does not show the true color.  The green is very mossy and almost looks gray at some points of the day.
Here is a bad shot of the Ikea Billy bookcases.  I have glass doors for the center unit that need to be installed.  The first unit will hold machines, the second is for paper and the third is for supplies.  I got those green baskets from Joann's on sale for $5.99 and I had a coupon for 20% off my order. But my real find was those black bins a Lowes.  Here is the ad:

Oh yes, Score! $5.77! When I first saw them they were $14.99.  Then they went on sale for $11.54. I even saw them for $8.08 and then they posted for $5.77.  I bought every one that they had at my local store.  Now I really need to tell you I had to bump them up a bit.  I glued the frame for more strength.  This shelve got a horrible review in the online review section but I knew I could make it stronger with a bit crafty good glue! Paul is cutting a white melamine shelf for the top and they will be linked together with zip ties in the back and inside.  I am thinking this will be my ribbon storage.  I know it can handle the weight because I made one eight drawers high for Sam and it is filled with DVDs. I like these so much I made this unit too.
See the open closet in the background?  I took the doors of the closet off and that is the space for the home office.  I have so much more to do in the next 2 weeks if I want to get my things moved in by the first week of July.  I am loving it all so far and I hope you stop back a visit to see how it comes out.  Wishing you all a great weekend.
Lysa 

Sunday, June 9, 2013

The Craft Room Started!

Hi Everyone,
It's a beautiful day here in Jersey and I should be out in the much needed (and awaited) sunshine. Instead I decided if I didn't get started with cleaning my newly acquired room I would not be able to paint next weekend.  I didn't get much done yesterday as I was helping Sam with 3 baskets that she needed to make for a cancer fund raiser so other than getting the furniture out of the room and lifting the carpet out not much was done.  It was really bad in there as we were kind of using that room as a dumping ground during the makeover of the other 2 rooms.  Here is the last picture I took before we started to haul out the rest of the furniture from the room:
If you could see our garage you would bust a gut laughing.  My line lately is "This place is a fireman's worst nightmare!"  Do you remember the picture of all my craft stuff loaded into the garage?(let's revisit that):
I was still able to get my car in there.  Now from digging in boxes, having all the pre-fab furniture arrive and be put together for the other 2 rooms the garage now looks like this:
Oh yeah, That's about where we are at!  See the one small exit path?  That is how we come and go.  I figure in an emergency it's single file only! And if you don't trip on cardboard or wood, you may just get out alive!  All kidding aside, I bet my car is back in the garage sometime around the end of July (or at least prior to the first snow fall).  Something tells me even after numerous trips to the recycling center there still will be a dumpster in my driveway.
Yesterday we lifted the carpet and I started to clean the room.  The floor in this room was in much better condition than Sam's (old), Rory's (new) room.  While the carpet in this room was replaced many times over the years the padding wasn't and as we touched it, it just fell apart in our hands.  With clouds of yucky red dust.  It was awful!  I said to Sam that I could not believe Rory wasn't having allergy problems living in this space.  Once all the carpet was out I swept and vacuumed for what seemed like hours.  This morning when I woke up I began cleaning the floor.  It really was not in bad condition at all.  The only real damage was from the carpet installer who cut the padding in place leaving 2 huge knife gouges in the floor.  This same damage was on the floor in the other room too. Unless the floor has a full refinish I will just have to live with them.  I didn't take a before picture of the floor but I did use the Minwax cleaner and reviver and it came out great.  Here is a picture of my nice clean and happy wood floor:

I am happy with the result and I think once the furniture is in place you won't see to much of the gouges.  I am going to paint this room green, but not the same green as the girls used.  I am looking for something along the line of  a sage or a pale olive type color. The accent colors will be black and white just as in the other rooms.  I hope to be done painting by next week end and working on my work counter and new lighting.  I am so excited that it's time for my room that my mind is racing at the thought of all my craft supplies happily in place in this new space. I just can't stop thinking about how I will be aranging things. Silly I know but crafting is the one hobby that has always been in my life.  I have just always loved haveing a bit of glue and a few bits of this and that to make something.  Better yet making something and giving it to someone.  I just get such a kick out of  that.  It's funny what keep us all going.  You know, that reason to get up and go to work thing.  This is just my thing that makes me smile.  Thanks for visiting and check back to see the paint job.
Lysa