Sunday, December 20, 2015

Christmas Tic Tacs, So Cute!

Hi Everybody,
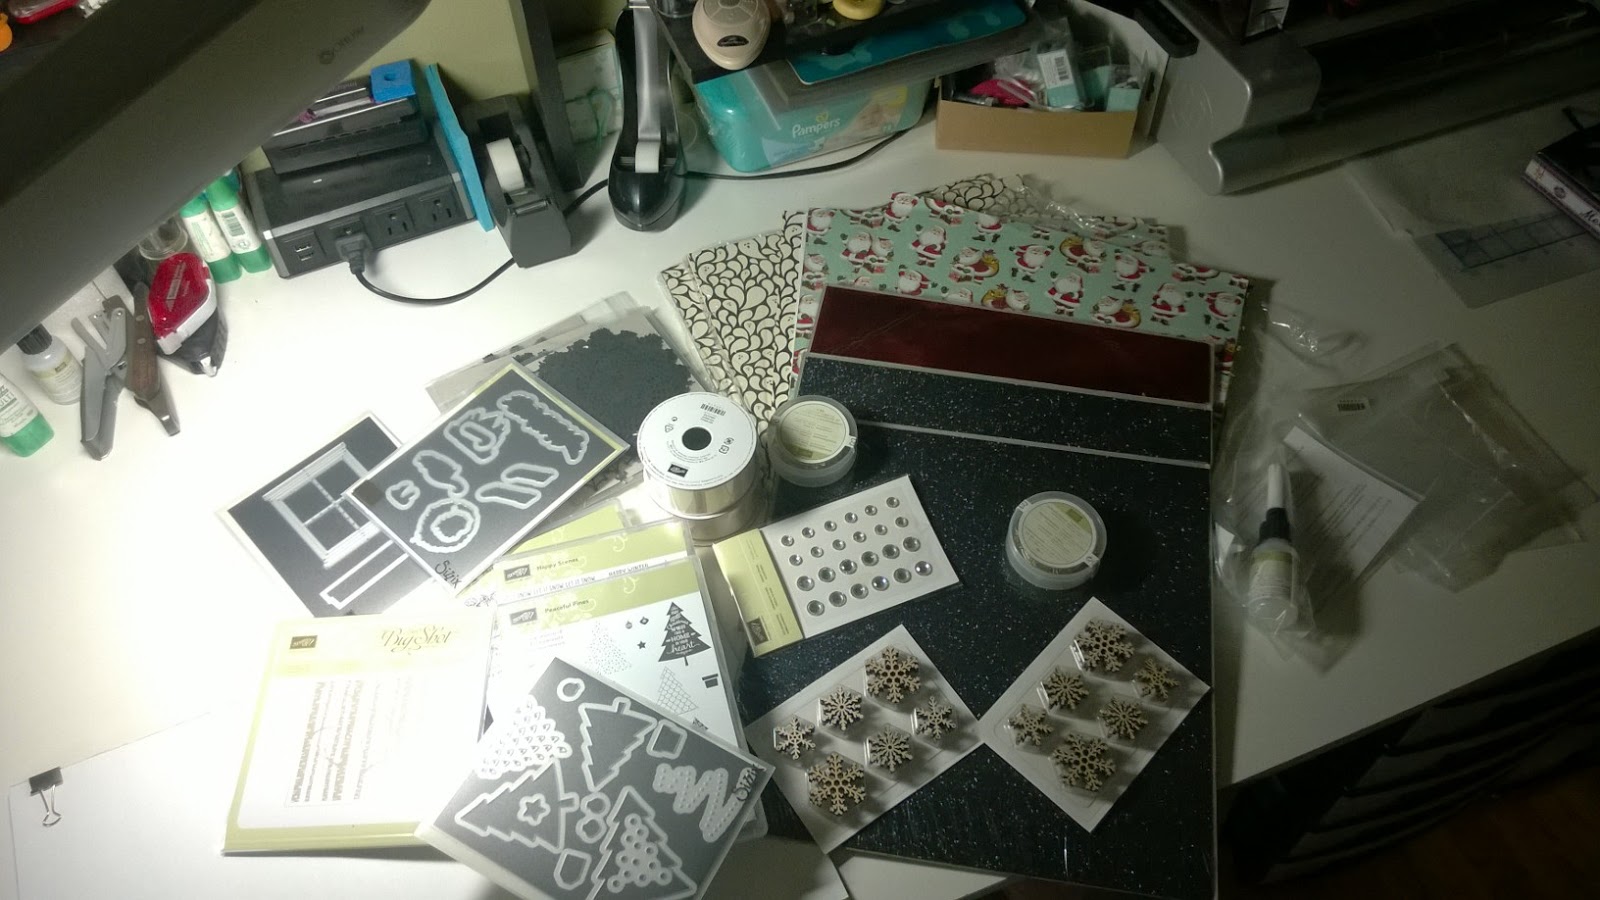
One more quick post. Just 5 days till Christmas and as always I am so not ready. It has been such a strange season.  The weather is so warm that it does not feel like the holidays at all.  There is not a bit of a nip in the air. We ate Thanksgiving dinner with the back sliding door open and something tells me Christmas dinner will be the same.  Once I get this post up I am off to start wrapping. I love to wrap and try to make the packages as pretty as I can.  My little favors this year that I leave on desks at work are cinnamon tic tacs.  Not to exciting but look how cute they are.
I saw these on a SU demonstrator website called Pink Buckaroo Designs. Her name is Erica Cerwin and you can find her here:
http://pinkbuckaroodesigns.blogspot.com
 I found the tic tacs at the Dollar Tree and I used Cherry Cobbler, Very Vanilla and a non SU Kraft paper. I just love the way they look.  Here is another pic:
The tic tacs are super mini's and they come 3 in a pack for $1.00 so I made 30 of them to pass out. Pretty darn cute for 33 cents a piece.
I just want to send out Best Wishes to all for a Very Merry Christmas and A Happy and Healthy New Year.  I hope next year I can find my way back to more steady blog posts and file sharing.  The year ahead will be busy because of my Daughter's wedding.  I so hope to share the crafty goodness I plan to be working on for the wedding. Again a Very Merry to All!!
Lysa

Sunday, December 13, 2015

Just A Quick Post

Hi Everyone,
Oh my how the days pass. I have not posted for so long that it appears as my crafty life has fallen to the wayside.  Truth be told I have been busy as a bee and all is well here on my end.  Christmas is upon us and I have been crafty but I just have not had time to post.  I haven't really designed anything new but I have been crafting. My story for today was quick and easy craft from days gone by that was designed by someone else.  Rory needed some Christmas gift for school friends and we needed to get them done fast. I am sure you have seen these in the past as they were a holiday fair item from about 2009 or so.  The snowman candy wrapper is a classic and adding a pair of gloves from the dollar store make them an awesome and affordable gift for tween school friends.  Here is the picture of the eight I made:
The face is a download that is available online.  The Hershey bar is the 4.4 oz. size. It is huge!! The gloves came from Dollar Tree. I did sacrifice 1 pair of gloves to make the scarves. I hope you like the way them came out.  Hoping after the holidays I will get into the routine of posting.  In the meantime best wishes to all for a very Merry Christmas and a Happy and Healthy New Year!!
Lysa

Monday, October 12, 2015

Ghosty and Witch Hat Clothespins and A Skully Necklace Too!

Hi Everyone,
Oh my, the month is flying by.  Surely it can't be Oct. 12th  already.  Normally in the month of October I have a lot of crafty good pictures to show.  This year while I have been banging out some crafty good Halloween projects I just have not had time to post or to prep a file for a file share. Let me catch you all up on craftroom happenings. First I have to tell you that I pre-ordered the KnK Force. YES, The Force WILL Be With Me! I am so excited that the machine will be coming to live in my craftroom sometime in November.  People it has a camera, Yes! A CAMERA. That is what you use for alignment for print and cut. Not only does it have a camera, it has true z axis, and a rotary tool. I plan to cut my little heart out.  The first thing I am going to cut is . . . a record album. Oh yes, records make for great recycled projects.  I plan to cut wood too.  I think that the craftroom is going to get pretty darn messy once the Force comes to play here. OK, so enough of that (mostly because I bought the Force with limited info and based my decision on how much I love my other 2 KnK cutters) but I do have a cool pic I got off of Facebook.  Here it is:
How sweet! It has color lighting!
Now for Halloween, I fell head over heals for the Stampin Up Witch Hat clothespin. True to form I had to make more of it than what it was. I just could not see why anyone would want the white paper backing on the glitter paper to show.  Come on Peeps, its all about the details. Part of me does understand that at $2.50 a sheet one might want to live with the white showing. I blew through my 4 sheets in about a minute because I made them double sided. So off to Michael's I went to get some more black glitter paper (also backed in white)(what's up with that, why would you not have a black backing???) Well it was a saving at @1.99 less 20% off my entire order (Thank you Michael's) While I was there I saw white glitter paper and knew right then that I had to make ghosties too.  Here is my pic of how they all came out.
I made 40 and the only thing I wish I had was white clothespins for the ghosties. I just didn't think to pick them up when I was at the store.  I love how they came out. I made so many that I even had some to donate to the Halloween bake sale at work.  I cut the ghosts with my ZING and most of the hat were made with SU punches but then I made a digital file because I was making so many.  Oh and Mr. Ghosts bow tie is my all time favorite Martha Stewart bat punch.  I swear I use it every year!!
So are you still with me? quick story, I get a home party catalog at work for Touchstone Crystal by Swarovski. Whooo baby, talk about pricey! So I see a necklace called the Zoe.  I loved it and thought this would be a great necklace for all us girls at the house.  After all we are all up and into Halloween.  Here is a pic of the necklace:
The price was $79.00 for the skull bead and the 6mm light amethyst pave ball bead. OK so it is two necklaces but no way could I buy 3. So off I went to one of my favorite bead suppliers Fusion Bead. Don't you know I made all 3 necklaces for less than the cost of 1.  And I even changed it up a bit to make them our own.  Here is a pic of mine and Sam's:
Hard as I tried to get good pics it was tough. But you get the idea. I am so happy with how they came out.  If you need to order Swarovski beads Fusion is a great source.  They always have a coupon. I made Rory's necklace just as the catalog one and it will look awesome with her costume this Halloween. Pics to follow for sure! All total with findings and chain I made the 3 necklaces for $58.00. The best part is that it is all Swarovski.
Thanks for visiting and let me know if you are interested in the cut file for either the Witch Hat or Ghostie clip, they were fun to make and if anyone wants the file I will take the time to upload it.
Lysa

Monday, September 28, 2015

Halloween 2015 - Projects Started!

Hi Everyone,
So happy to tell you all that Halloween is in the HOUSE!  I do so love when I am decorated for the Halloween season.  Now mind you I am not scary or gory at all.  More like country store. I know that once the rooms are filled in all their black and orange it is easy for me to find my Halloween Mojo. Being a former and brief hobby demonstrator with Stampin Up, I always make it a point to follow all my SU favorites and there is always some new and adorable item I just can't resist.  This years is the Witch Hat clothespin clip.  I have already made 18 of them and will most likely make another 20.  Here is a picture of how I am using them as a topper for my Hershey Nuggets.
How cute are those little hats.  I got my instructions from Angie over at ChicnScratch.  Here is the link to the video where she shows you how to make it.
http://mychicnscratch.com/2015/09/12-weeks-of-halloween-2015-week-7.html

Now I have to tell you I (true to form) needed to bump mine up a bit. The hat is made from a 2.5 inch circle punch with a 1.25 in circle cut from the center and 2 of the Christmas tree punches.  Well I cut double of all the parts and adhered them wrong sides together.  I did this because the black glitter paper is backed with white. I just did not like the white showing.  I also could have used plain black cardstock but I wanted the glitter to show everywhere.  I also inked out all the white edges.  So what was meant to be a little quickie ended up being a bit more labor intensive but so worth it.  The bows are made from the SU bow punch.  For all my digital cutting friend this file would be so easy to create with a simple circle and a triangle.  I did use all punches so I did not bother to create a file. Now all that is left to do is make a cute little tag.  I am pretty sure these will be this years work favors.  I just love them, Don't you?  Thanks for stopping by,
Lysa

Sunday, September 13, 2015

Mets Themed Baby Shower - The End!

Hi Everyone,
I am going to keep this as short and sweet as possible.  Oh my, I am so glad these favors are done. Not because I didn't enjoy making them, but because my Stampin Up holiday order arrived and I did not want to open the box until the favor boxes were done.  I have more pictures than words so lets get on with that. When I last posted I had made the 80 box bases.  There was still so much more to do.  I started by prepping the tops. I cut and scored clear plastic sheets for the lids.  They came out great but I did not take a picture of them.  No good photo will come from clear plastic. Next up was the belly bands for the box. Oh my lord why would I even think of deckle cutting these strips.  Math time peeps, each box required 2 strips so then the deckle edge required 2 cuts, which then equals 4 passes through the trimmer per box - times 80 is (HELLO PAIN) 320 passes through the paper trimmer.  Thought my arm was going to fall off! Here is a picture:
 I did have some printing issues as well but I am back on the road with my new Canon laser printer. No need to get into the whole ugly story. All the graphics were done with Serif CraftArtist2.
Pretty in groups of 20! now to get them on the box. That was easy, just took an amazing amount of tape runner from my Scotch ATG gun. Once done it was on to the tags.  Back to the computer and printer we go.

And of course they need to get punched . . .
And backed with SU Night of Navy . . .
So that it would all end up looking like this . . .
Boxes ready to be filled, bowed and tagged!  They came out great and I am told the boxes will be filled with cookies that are shaped like a bat, baseball, baseball glove and baseball cap.  I think they will look just Grand Slam at the shower. I will leave you with this last picture of my SU Holiday Haul . . . Crafty Goodness is on the way for sure.
Bad Pic - Good Stuff, See you soon, thanks for stopping by,
Lysa

Tuesday, September 1, 2015

Mets Shower Favor 2, Back to School and WORK too!

Hi Everyone,
Gone for 2 weeks or so but now I am back in the craftroom for a last hooray before going back to work tomorrow. UGH!!!! So I had a wonderful vacation at the Jersey Shore. Love me some LBI.  I have to show you my moon pictures. Not because they are great but because I love them. I took a pic on the first night and then one on the last night.  How cool is my Nikon to catch the craters . . .


Awesome, between the moon and the ocean I started to feel a bit small. Which was OK by me! The whole family had a so much fun, We did all the normal Jersey Shore things and I shopped my little heart out too. The sun was great and no rain fell on our parade.  Please don't ask about how many calories I consumed!  Yummy food every night! Not just back to work but back to diet too!  So I took an extra 2 days off so that I would be home for the Stampin Up holiday catalog launch.  Yes, I did get up at like 3:00 a.m. so I could place my order. Yes, I did. Crazy I know but can you blame me?, it is an awesome holiday catalog.  Good thing I saved some of that vacation money cause I did some heavy damage this morning. So since getting home on Saturday I knew I had to get some work done on the Met themed baby shower favors. On Sunday I used my ZING to cut the 80 Night of Navy box bottoms. It was a pain because I could only get 1 box on an 8.5 X 11 piece of cardstock. So shame on you Stampin Up for no longer making 12X12 cardstock in the colors. So that was a full 80 cuts and the left over scraps? well who knows what I will do with all that paper.  On Monday I cut all the box tops, but this time I hand cut them.  I just could not get into loading the mat hitting the cut button etc. . . . Once done with that chore I hand scored them both. Yup, 4 score lines times 160 yet again equals OUCH! but it is done and I am a happy crafter! Here is a pic of 40 box bottom:
They folded up great and I used SU fast fuse to glue them.  So now it is onto the belly band for all those boxes. Before I go the little one (who is no longer little) is headed back to school tomorrow.  Her Mom took her for a hair cut and a mini shopping spree for some new clothes.  I have to share last years first day and a pic from last night.  I could just hug the life out of her I love her so much . . .Here she is  ready to conquer Middle School.
And here she is the mighty conqueror.
 Wow, what a difference a year makes! Congrats Rory on making it into honors math and performing arts gifted program! Hope to be back with more of the Met's shower favors by Saturday, wish me luck. Thanks for stopping by,
Lysa

Sunday, August 16, 2015

Congratulations, It's A Met Fan!

Hi Everyone,
Yes, A Met's theme baby shower project is on the craft table.  And it's BIG! So big I have to break it up into sections.  When I set out with the design I had no idea I would be making 80.  Now 80 of anything never really puts me off but in this case just the side tags on the box required many, many paper punches. And by many I mean 160 orange (SU Tangelo Twist) scallop ovals, 160 blue (SU Night of Navy) modern labels, 160  white ( SU Whisper White) 7/8 round scallop circles, 160 printed Met logos 3/4 inch round punch and the kicker of it all 320 printed baseballs 1/2 inch circle. Lets do the math . . . 960 punches. OUCH!! my hands are taking a beating. Here is a picture. Please note the Met logos are not in the picture!
Wow, Now to get started putting them together,  I did my best to stay as organized as possible. Here is the next picture. Here comes the 160 Met logos!
Looking good even if I say so myself! Now for those baseballs and the finished tags!
I am not going lie, it was the baseballs that took me to the brink! Yes, they drove me to drink, and it wasn't coffee! Here is a pic of where the tags will happily live until they go onto the finished box.
Oooh,ah look how nice they look ready to go and in groups of 20 tags (10 boxes) Well now I am just getting silly! So here is the schedule to finish off this shower favor project.
80 Night of Navy box bases (machine cut with my ZING)
80 Clear plastic box tops (machine cut with my ZING)
80 Printed Met logo belly bands (really 160 pieces put together to make a 17 inch strip, hence the 2 tags per
     box, so the seam would not show) really, I kid you not!
80 printed tags with the new Mom's name and the date of the shower. Shaped like a baseball, of course!
So I am now taking a 2 week break due to my real life job. Stay tuned for the finished project.  I hope to have this completed by the 2nd or 3rd week of September so that I can get my Halloween MOJO on!  Thanks for stopping by,
Lysa

Tuesday, July 28, 2015

Crib Explosion Box

Hi Everyone,
I took a break from wedding things to make this explosion box for a co-working who is having a baby. I had so much fun making this box that I just had to share it with you all.  First I have to say I was under a bit of pressure to get it done as I was asked late in the game to make a card that would hold the gift card we were giving her.  Well I spent just about the entire weekend in the craftroom making it.  But I have to say I think it was because of the theme.  I just don't have a lot of "baby" themed graphics and papers kicking around in my craftspace.  I had said to the family if I needed to make a Christmas or Halloween themed explosion box I could have banged it out quickly.  I had spent so much time looking for graphics and making the crib that the whole thing got away from me.  In the end it was worth the effort because it came out awesome and my all my co-workers were excited to give the new Mom her gift card. First I have to show you a picture of my desk as I was making it.  This was my first so you know the paper scraps were flying! I even posted this on my facebook page. Here is the pic:
WHAT a mess!!! But then it all started to come together around that adorable 3-D crib that is perfectly sized to hold a gift card. Here are the pictures that I took and while they are not the best I am sure you will get the idea of how the box came out.
Wow, Do you love it too?? I knew I was pressed for time and searched for a crib file online but they were all for sale and I thought I could make one fairly easy just by looking at a picture.  I saw some really pretty ones for sale but I thought if I kept it simple I would be able to create it quickly.  I used my CAP2 software to make the file and  exported it as a pdf so that I could use my ZING and MTC to cut it.  Well all went well and I thought I would share the file with you all.  Here is a picture of the pdf file:
So cute! If you want to try to make the crib you can fine the pdf file here:
http://www.mediafire.com/view/hkr6ldzmvlx3weh/crib_to_post.pdf
and as always for my MTC peeps you can download the file here:
http://www.mediafire.com/download/wc8788k344oev2l/crib_by_lysa_and_huey_to_post.mtc 
 If any of you have any questions just leave me a comment and I will do my best to help.  I really love this explosion box card and will make more in the future. I am already thinking a wedding one would be fun to create.  I could just see a wedding cake in the center. Thanks for visiting and PLEASE enjoy the file and consider leaving me a comment, I so love to share files and comments inspire me to share more.
Lysa

Saturday, July 11, 2015

Berry Basket for the Wedding

Hi Friends,
I can't begin to tell you all how far along with wedding crafts I am. I feel like I am really getting organized and ready to do the large scale supply buy. I have made a lot of samples for Sam to look at and one by one final choices are being made.  We wanted to make a wine and cheese basket as a favor or take home snack for after the reception. I was all over this one from the onset. My work peeps we too, telling me it was cost exorbitant. I laughed and said you're joking, I could bring this baby in for $8 each. Yeah well the joke is on me, because 1 mini wine bottle turned in to 2. 1 piece of cheese turned in to a piece of cheese and a mini summer sausage. The hershey nuggets became Ghiradelli. We had to add a charm to each wine bottle.  The saltine crackers became Carr's crackers. The basket filler went from shreds from the dollar store to custom shredded Stampin Up Cherry Cobbler cardstock. I could go on and on. I don't even want to mention that the berry basket paper went from SU black cardstock to this awesome shimmer paper that is imported from Italy and purchased from LCI paper. That happened when we decided the basket paper needed to match the invitation paper. Sure . . .  sure you want me to tell you how it all priced out in the end. Well all I have to say is . . . Can we really put a price on the smile on my and my daughters face? I do so hope you are laughing along with me and not shaking your head at how crafty crazy I am. I can't even tell you the full price out because I still have not packaged it under cello or made the outter tag.  Plus you know I have to add some ribbon to the outside too.  Oh well this is me, always was and always will be! So I have the berry basket file for you today.  First off here is a picture of the file:
If you would like this file the PDF is here:
http://www.mediafire.com/view/lxfb54fbnd7j5vf/berry_basket_for_upload_with_notes.pdf
If you prefer the MTC file you will find it here it does not have score lines on the top strip:
http://www.mediafire.com/download/akbhww7ejgr40e8/berry_basket_mtc_for_upload.mtc
I also want to show you a picture of the cheese board with the kids name and wedding date added here is that picture:
The pictures of things you see along the way are all from the samples I have been making. All of the ribbon has now been changed out from Stampin Up Cherry Cobbler to Offray Sherry in satin.  The Stampin Up linen and seam binding ribbon was just freying to easily.  I could seal the edge of the linen but not the seam binding. Plus the shine of the satin is much nicer.  The tealight place card holders look so much better with the ribbon change out.
I will be making the final samples of everything from the invites to the basket in the course of the next few weeks so that I can get my supply lists ready. Wish me luck, the craftroom will surly be hopping!  Thanks for stopping by,
Lysa

Sunday, July 5, 2015

Back, But Never Really Left

Hi Crafty Friends,
WOW, how long between posts? Too long!! First a quick catch up . . . spring cleaning, end of school year, heavy work load and knee surgery too. No need for the details on any of that. Simply put life has caught up with me for sure!! Through it all I have been crafting and gathering ideas. Wedding ideas! How is it that when a wedding is a year and a half out, one becomes obsessed with all things wedding. So I have one daughter and while I have never been a party planner type, I have resigned myself to the fact that I want it all to be perfect.  I have looked at favor ideas on pinterest, etsy, ebay and every wedding site on the net. I have purchased paper samples, favor samples, you name it I have already researched it. I am now done! The wedding is a year and a half away and it's time to rein myself back into reality. Now with that said I am starting with the most simple reception item I can think of.  The seating cards.  You know, when you get to the venue the little card that tells you what table you are seated at.  If you dare go ahead and google the phrase "wedding placecard holder ideas".  REALLY, there is like hundreds of ideas that would run from cheap to crazy expensive.  So my job as Mom of the Bride was to find the one we could afford, I could make, and the one that would fit the moment.  Come on peeps!, have some faith, I found it. and we love it!!! The venue where the wedding receptions is to be held has an awesome black grand piano at the top the this great staircase.  That is where the venue puts the seating cards.  So the guests come up the steps and the first thing they see is this beautiful piano. After much research and some trial and error, Sam and I thought some form of candlelight on the piano would be awesome, so why not incorporate candlelight and the place card together. The venue would not allow for wax candles so we knew going in that battery operated tea lights would be our best and only option.  I saw on google images some great tea light holders using them.  I ran (yes, ran . . . operated knee and all) down to the kitchen drawer where all my votive holders are and grabbed a plain 2-1/5 inch tall glass votive holder and got to work. I used CraftArtist2 to create the vellum wrap for the holder.  I printed the label on my Canon laser printer and foiled the label with silver foil that I bought from MyBindingCo.com. (for an awesome price, I might add) and I use my laminator to foil the label. Wow!  I can just see 60 or so of these sitting on top of the piano.  I think the best part will be that everyone will bring these to the table so there will be additional  candlelight on every table during the reception.  I have pictures and I only wish it was a picture of all of them, but for that you will need to come back and visit around November of 2016!  If you have any questions on how I created the template let me know.  Here are the best pics I could get:
Thinking that the SU Cherry Cobbler seam binding ribbon will be changed out for something satin.
I promise I will add a pic of them all at some point.  In the meantime, my next quest will be the bubbles. Gotta have bubbles at the church for sure! I can't even begin to talk about the favors for the wedding and for the shower.  We surely have become "go big or go home"! So much for the budget, oh well, only one daughter so I guess I am going BIG!!
Thanks for stopping by,
Lysa

Saturday, June 6, 2015

Big News about A Big Day!

Hi Everyone,
I can't believe that  I lost touch with my blog for a whole month.  This seems to happen every spring as I take on spring cleaning, room decor switch and pool opening. Now that I have things somewhat in order I am back in the craftroom and ready to go.  My big news about a big day is that my Daughter and her fiance Leon have set a wedding date. Booked the Church and the venue as well.  I have signed on to assist with some crafty goodness.  We have plenty of time but we have started getting some things together.  The invitation mock up is done.  The colors are still in the air until we get out to the stores or online for paper samples.  Looks like Black, White and Stampin Up's Cherry Cobbler are in the lead.  The Cherry Cobbler may be switched out for a merlot or burgundy. We just won't know till we sample some papers. I made a logo for them. Which now adorns the rear window of her car.  I cut it in vinyl and it looks great. Here is a pic:
So reflective you really can't see how nice it looks.  Here is a picture of the graphic:
I plan to make a rubber stamp and an embossing folder of the logo.  The double hearts are an Inkadinkadoo stamp that is still available for purchase.  I will buy that as well.  The font is chaucer and is the same as my blog header.  It has been a favorite of mine for years. I made this logo using CAP2 and cut the vinyl using SCAL4 and my KnK ZING. Sam really likes the logo and I think we will switch it up here and there keeping the linked hearts as a running theme.  Well that's about it for now. I will keep you all posted on the wedding crafts as they appear on my craft desk.  Thanks for stopping by and have a great weekend,
Lysa

Saturday, April 18, 2015

This Week In Bracelets

Hi Everyone,
Spring really never sprung but it is surely summer here in Jersey today.  It is almost 80 degrees outside.  I am wishing the pool was open! I have been busy getting started on the summer decor around the house so that once it is time to get outside for power washing and pool opening I will be ready.  In the meantime the craft room has been buzzing as well. I have been making bracelets per requests.  I have been totally enjoying it as I really feel I am creating a one of kind piece for someone.  I am no kind of jewelry designer but I am one crafty good girl!  When this whole bracelet thing started I wanted to figure out a way to make my charm bracelets my own, meaning I wanted the bracelets I was making to be different from what one might buy at a local craft fair.  Starting off I know these bracelets are not high quality jewelry  but the fun trendy jewelry we wear for a season or so.  Back at Christmas when Rory and I started making the charm bracelets I made sure that the bracelet blanks we purchased were lead and nickel free.  So important!!!  I had settled on copper core bracelet that were plated in sterling silver. I liked the color much better than stainless steel. I have been wearing many of the bracelets that I made since the Christmas season.  You can clearly see that the copper starts to show after about 2 months of wear.  I am pretty hard on jewelry so another may get 3 months before seeing the silver plate start to wear.  Funny thing is that I liked the bracelet just as much even after the copper started to show. Someone else might not feel that way so now when I sell a bracelet I show the person the one I am wearing and let them decide if they still want to buy the bracelet. The second thing I tried to do was to create a "signature" for the bracelets.  Right from the beginning every bracelet had the following charms in addition to the "themed" charms. First the angel  My thought is that we all need an angel close by. Second is the 2 silver teardrops.  Water is the life force that goes back to everything.  Every bracelet I have made so far I can theme back to water.  I have made the following:
snowflake/snowman: snow comes from the raindrop
seashell/beach: the ocean water
runner bracelet: beads of sweat from the labor of the run
memorial bracelet: the tears at the loss of a loved one
gardening bracelet: the water needed to grow
generally speaking we can always have tears of joy, I see a new baby bracelet, wedding, etc. 
I could go on and on . . . .
The third charm that is on every bracelet is a "made with love" tag that is shaped like an envelope. You can buy this charm anywhere.  I like it because I want the person to know that I really did love making the bracelet.
The fourth item on each bracelet is a their initial hand stamped on a sterling silver metal tag. This is how they know I made it for them.  I have enjoyed learning metal stamping.  It is fun and noisy too!
The other thing I decided was the package needed to be specific to the bracelet.  I either made a graphic or used themed cardstock for the box. It makes a huge difference when I bring the person the bracelet. Plus it keeps me using all my papercrafting supplies. I really have loved making all these bracelets and I find I am using charms for all kinds of things.  I have added them to cards, made wine charms for glasses, added them to dress up candles.  Simply put, I just love playing with them.  Here are a few pics from this week:
Made 2 like runner bracelets - You go girls run like the wind!
Made 4 like memorial bracelet -RIP Leon G.
Thanks for stopping by and enjoy the weather.  I really think we are done with WINTER!!!
Lysa

Friday, April 3, 2015

Lindt Easter Bunnies, I LOVE 'EM!!

Hi Everyone,
Just a quick pit stop to show off this years Easter table favors for Sunday.  I have been so busy I didn't think I would get to it.  But, with those cute little bunnies starring at me I had no choice but to stop what I was doing and make them up for Easter Sunday dinner. Here is a picture of how they came out:
 So cute, all I did was use my ZING to cut a four petal shape.  I just folded each petal up and tied around the square to create a box. I curled the paper around pen to create a petal look.  The shape looks like this:
I didn't even need to score the fold lines! The paper is K&Co. and it folded and curled perfectly.  I made the tag markers in CA2 and used my Brother SnC to cut them out.  They came together so quick and easy this morning that I can move on to making my cheesecake! Here is one last pic:
Wishing you all a Happy Easter,
Lysa

Sunday, March 29, 2015

Kumihimo! Yes To A New Love!

Hi Crafty Peeps,
KUMIHIMO, How ever did I miss the onset of this crafty goodness?  Just a quick post to say WOWZER, I love to braid!!  I had shown the little one (Rory) a video by the "Frugal Crafter" (here is the link)
https://thefrugalcrafter.wordpress.com/2015/03/19/like-the-ones-you-made-at-camp-only-better/
and I watched as her eyes widen. Perfect I thought for this summer.  Let's get braiding.  Now I am not FRUGAL in any sense of the word so even after watching numerous vids on how to make a braiding disk, I of course went out an bought not 1, not 2, but 3 disks so that all the girly girls in the HOUSE could get their BRAID on.  Here is my first pic of my set up with the disk.  A basic spiral thanks to the frugalcrafter!!
Now mind you I should be in Easter mode as we are here in the end of March but I just happen to have yards of orange and black 2mm satin rat-tail in my crafty stash (You go Lysa, Save Everything!! Atta Girl!!) Super easy and super quick I love me some KUMIHIMO!! This my friends will be the beginning of a new love affair with fibers, beads, and all kinds of crafty goodness. Shout out of THANKS to Lindsay over at her blog  https://thefrugalcrafter.wordpress.com/
because I now know my summer will be spent well poolside and at the beach with an awesome craft that Me, My Daughter and Granddaughter will be enjoying this summer.  Here is a pic of my first finished bracelet. WOW Halloween in March.  Somebody please send me a Bunny!!
 See you next week and thanks for stopping by,
Lysa

Sunday, March 15, 2015

Busy In The Craftroom!!

Hi Everyone,
The weather here in Jersey is finally starting to break.  I still have my snowman collection on the mantle and was hoping to get them put away and all my Easter bunnies up this weekend but instead I hunkered down in the craftroom to play.  I completed 120 baby shower favors for one of the work peeps whose having a shower for her daughter. I have been making tons of bracelets too. First the favors: The shower theme is "Ahoy It's A Boy"  I had a lot of fun with this simple favor.  I used CraftArtist2 to print the tags and then cut them out with a Spellbinders label four die.  Each favor has 5 lifesaver candies that went into a plain candy bag from AC Moore.  The base of the topper is a 4X4 piece of cardstock, folded at the 2" mark.  I used a corner punch on the ends and a corner rounder on the top.  The label is popped up with SU stampin dimentionals.  Plain twine from the dollar store and an anchor punch to finish it off.  Simple and cost effective.  My friend from work saw a picture on Pinterest and they were super easy to duplicate.  Here are the pictures of them ready to go.
With the favors done and out of the way I could get back to some bracelet making.  I have been having a blast trying to use recycled products.  The first was the zipper bracelet.  I love, love, love this one.  I pulled the zipper out of an old pair of jeans.  I thought this would be a great summer bracelet and its patriotic too!  Here is a picture:
You can find instructions for these cuties all over the web.  I cut out the zippper and cut the binding as close to the zipper teeth as I could.  I sealed the binding along both sides with a lighter so that the binding will not fray.  I drilled a small hole right through the zipper bottom with my rotary tool.  I just added the clasp and some charms and called it done.
Then I wanted to make a bracelet for a friend who just got promoted to Court Administrator.  I picked up some law themed charms the last time I placed an order so I was ready to go when her promotion came through.  Here is a picture of the bracelet and the awesome box I made to put it in.
How cute is that? Here is the box:
She loved it!!!!
Then I got it in my head after seeing bracelets made out of guitar string online that I wanted to make one.  And don't you know the Hubs is a guitar player. Yup, he is and I have guitar strings all over the house.  So here is a picture of my first attempts:
 I made the Pink Floyd one for Samantha and I will be sporting the patriotic one this July.  I had a lot of fun with the guitar strings and will be making many more of them I am sure.
I have been complaining about my picture taking skills a lot lately so the Hubs went to the dollar store and for a grand total of $5.00 he made me a little portable photo booth.  Wow what a difference.  He bought 2 pieces of foamcore board, a sheet of white poster board, a roll of packing tape and a white plastic table cover.  He made 4 frames from the foamcore (3 sides and a top) He covered each frame with the white plastic and taped 3 side by side leave a little gap so they could fold up. He clipped the white poster board to the back with binder clips and rested the top in place.  I used my Ottlight for the lighting but plan to buy some clip on lights for each side.  It worked great and you can really see the difference in the last picture.  Oh yeah and I used a coupon at Michael's to get my hand.  At least you can see the bracelets now. And just to show one more picture, here is another summer bracelet:
Thanks for stopping by and enjoy whats left of the weekend,
Lysa